This guide will show you how to export a model from one Kiuwan account and import it into another account.
Contents:
| Table of Contents |
|---|
Exporting your model
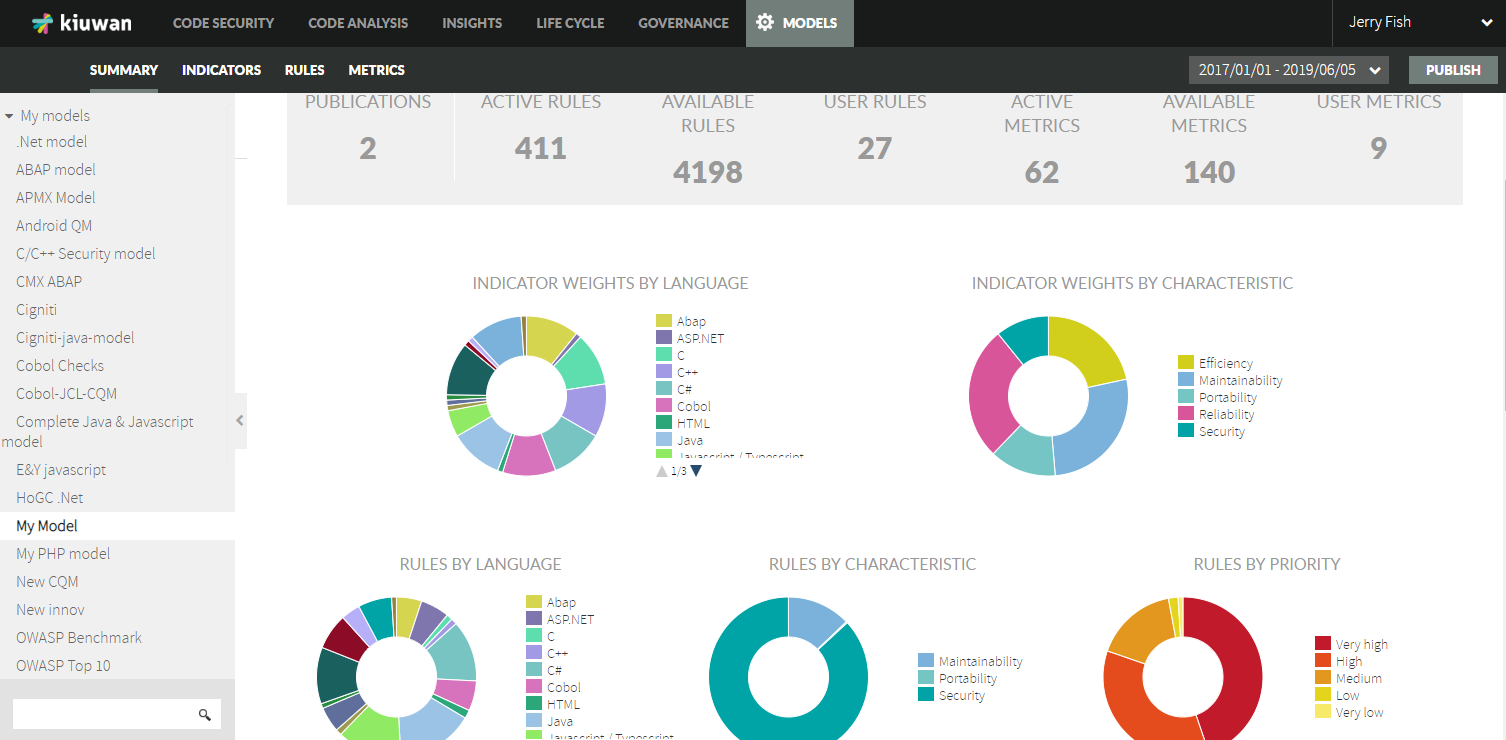
- Go to Model Management from the drop-down menu on the upper right corner.
- Select the model you want to export on the left (in this example: My Model).
...
...
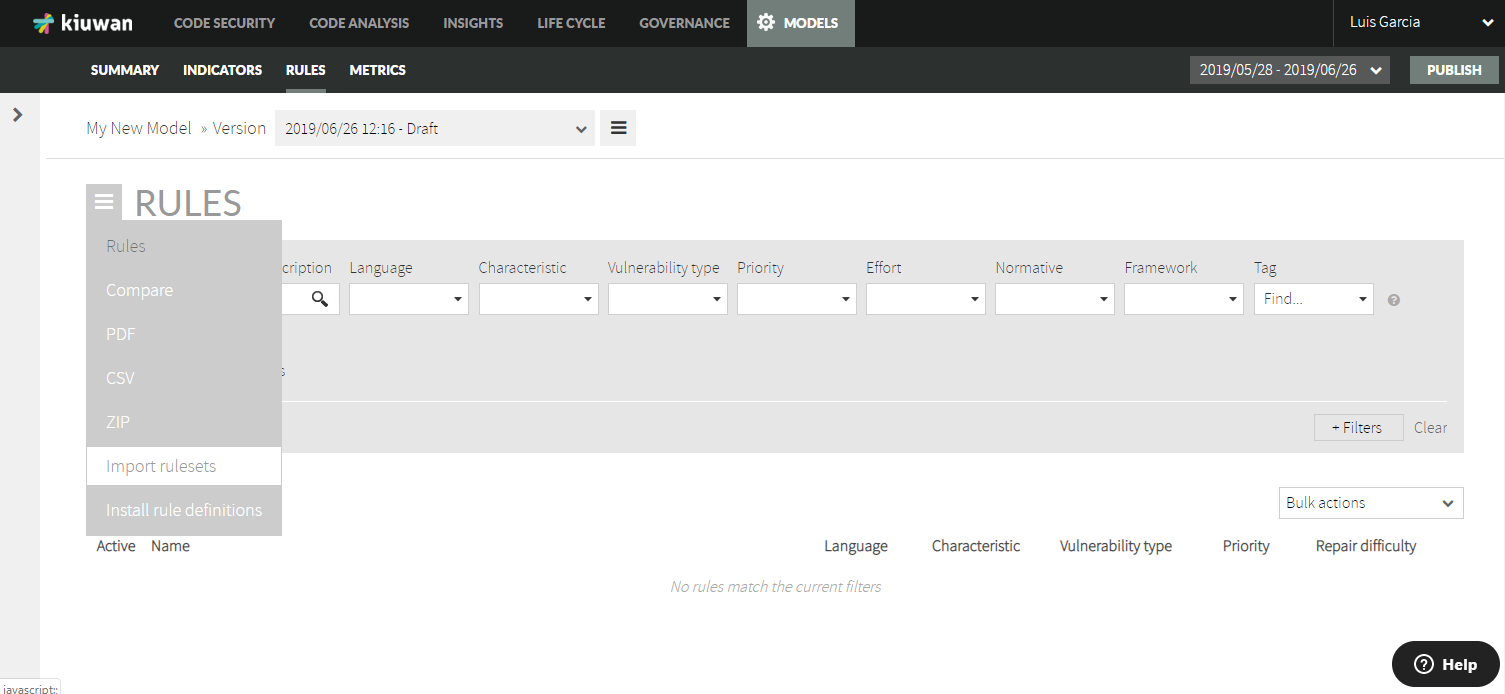
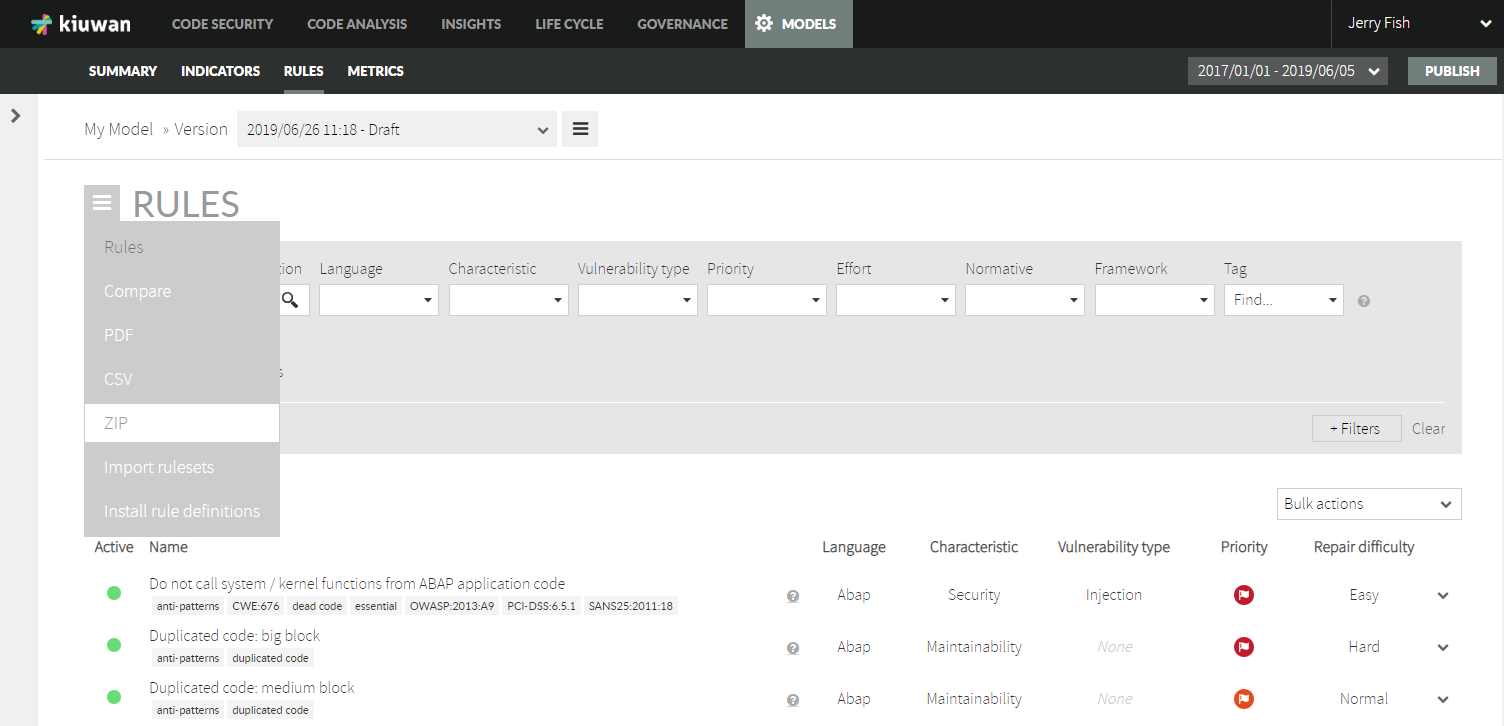
- To export the model, go to the Rules tab.
...
- Expand the hamburger menu and select ZIP.
...
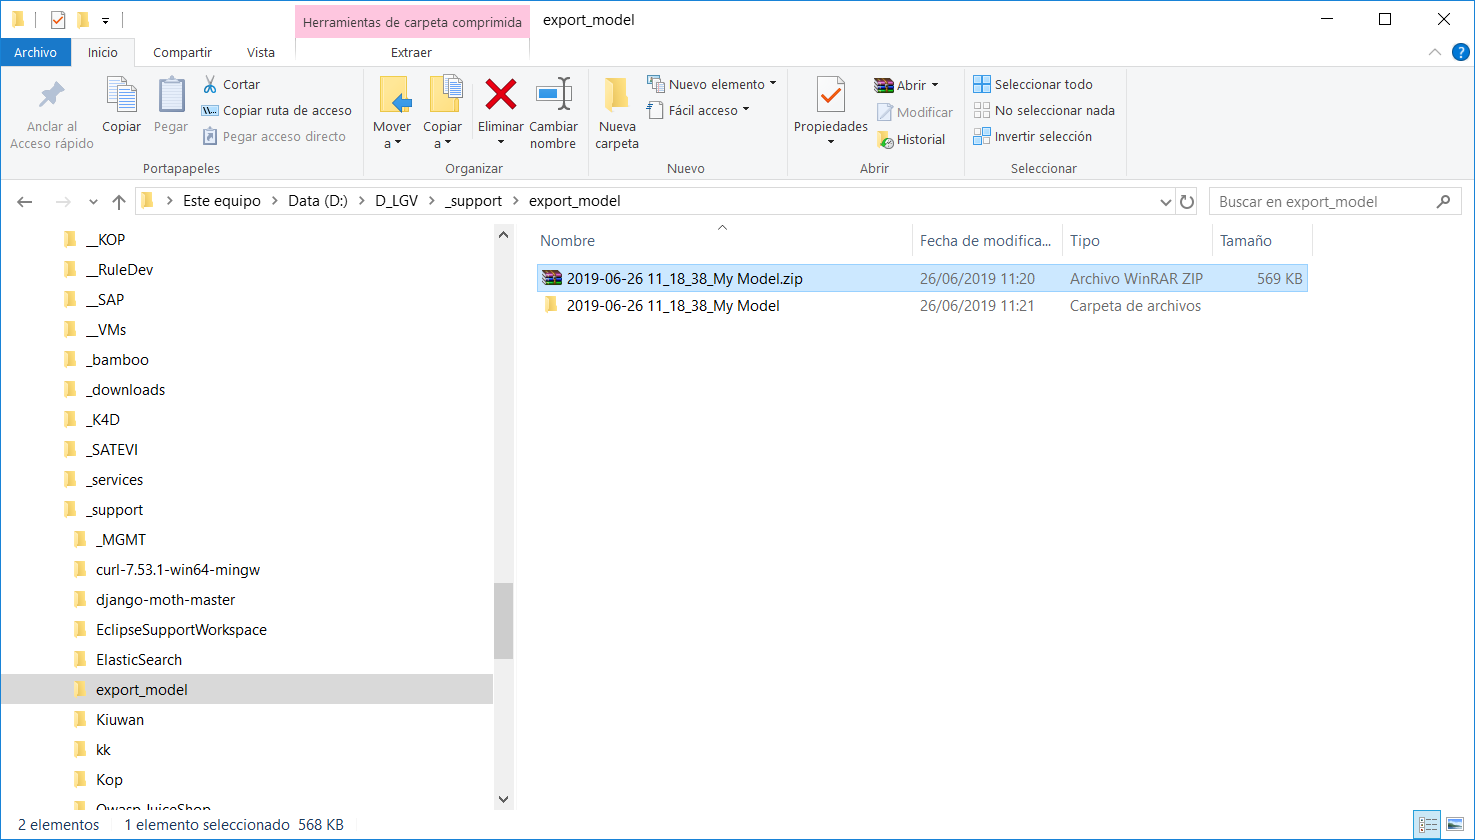
- A zip file downloads.
- Unzip this file into a temporal directory.
...
- You
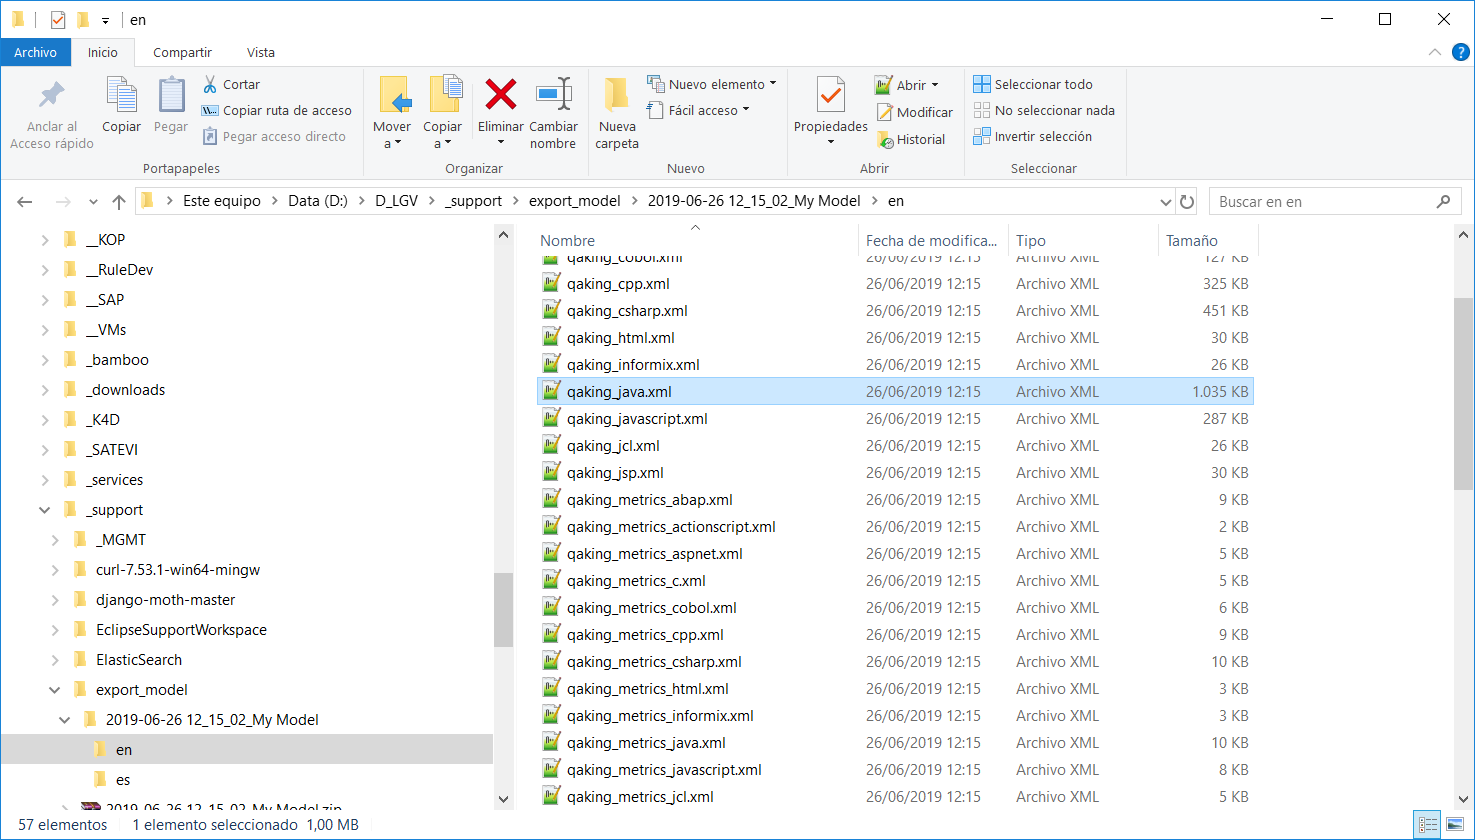
...
- find two directories (en and es). The en d
...
- irectory contains the exported model files you will import later.
- Now the file is ready for import.
Importing the model
- Log into your other account.
- Go to Model Management.
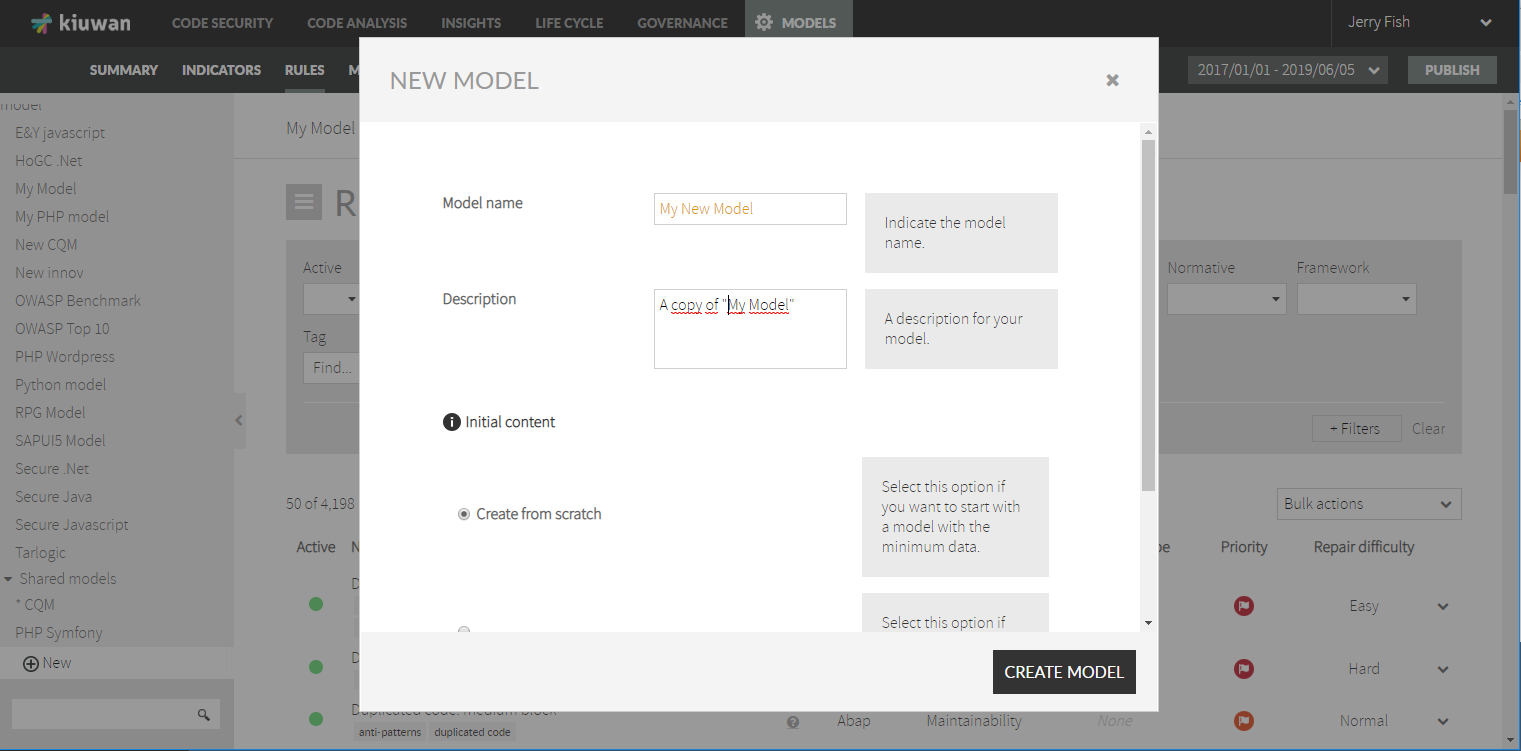
- Select New.
- Enter the Model Name, select Create from Scratch, and
...
- click Create Model to save.
...
...
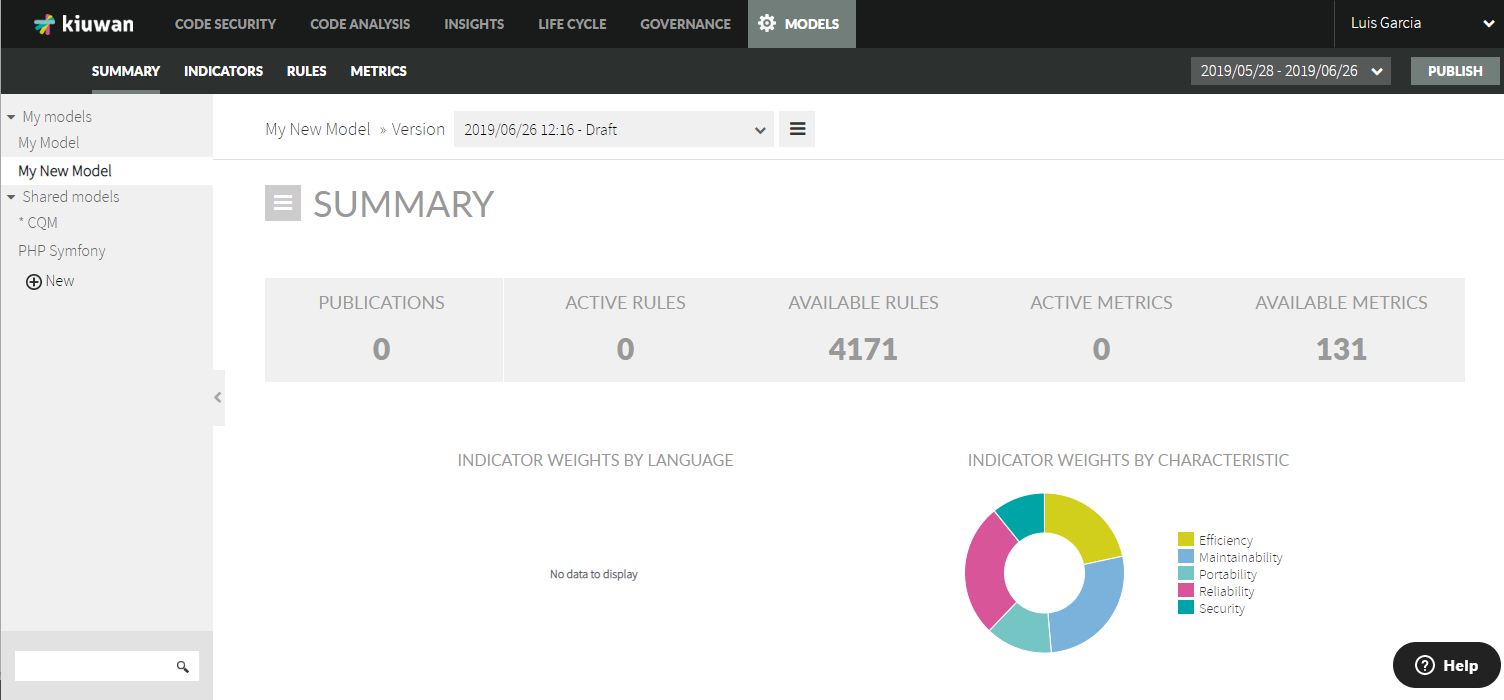
- The new model
...
- appears in the menu on the right. This model has no active rules.
...
...
- Go to the Rules tab.
...
- Expand the hamburger menu and select Import rulesets.
...
...
A dialog window
...
appears where you can upload the exported model files.
Info Exported rules files follow this pattern:
qaking_<technology>.xml
where
...
<technology> is any of the technologies supported by Kiuwan (Java, JSP, C#, etc)
...
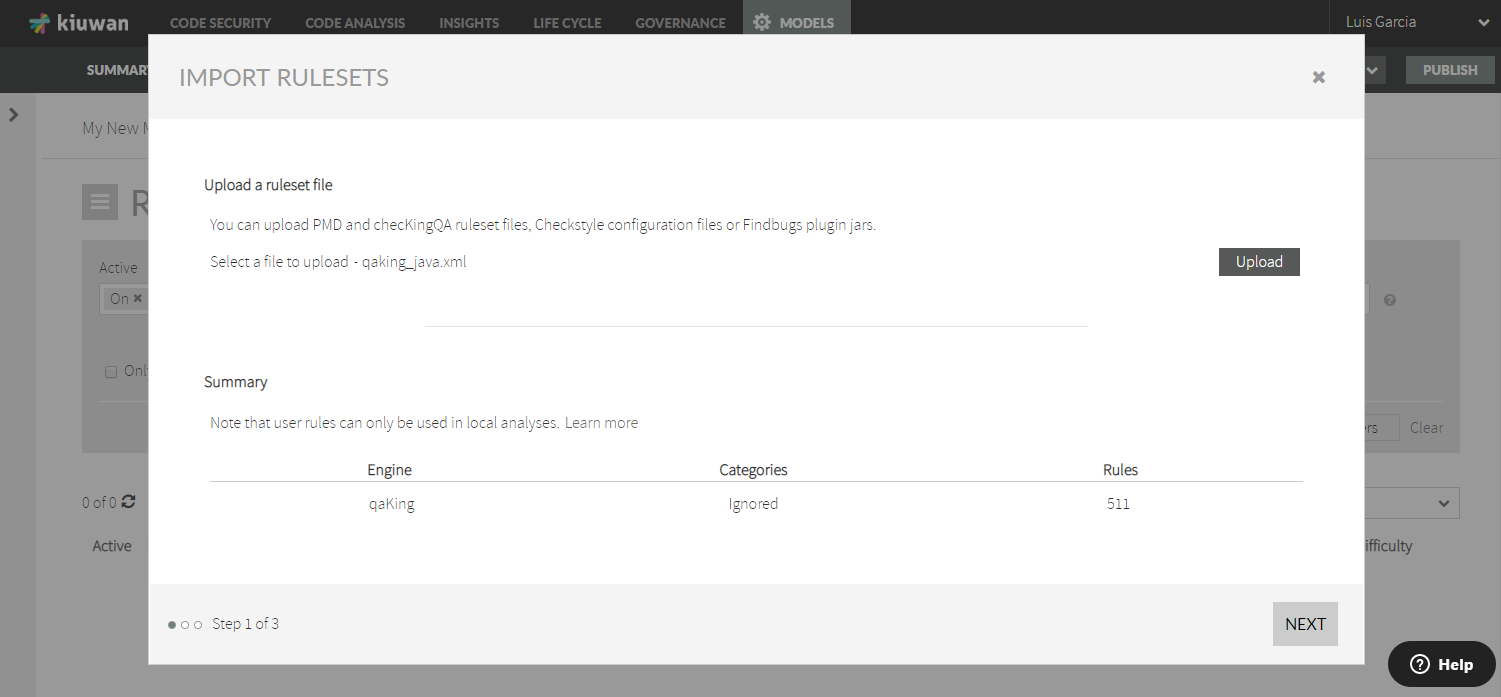
Warning These steps must be done for every technology file.
Currently, there's not an option to upload more than one file at a time. Therefore, the next steps must be repeated for every technology.
Be sure to select the en directory when uploading the files.
Once the technology file is uploaded, select the target model (the one that was created in step 3).
...
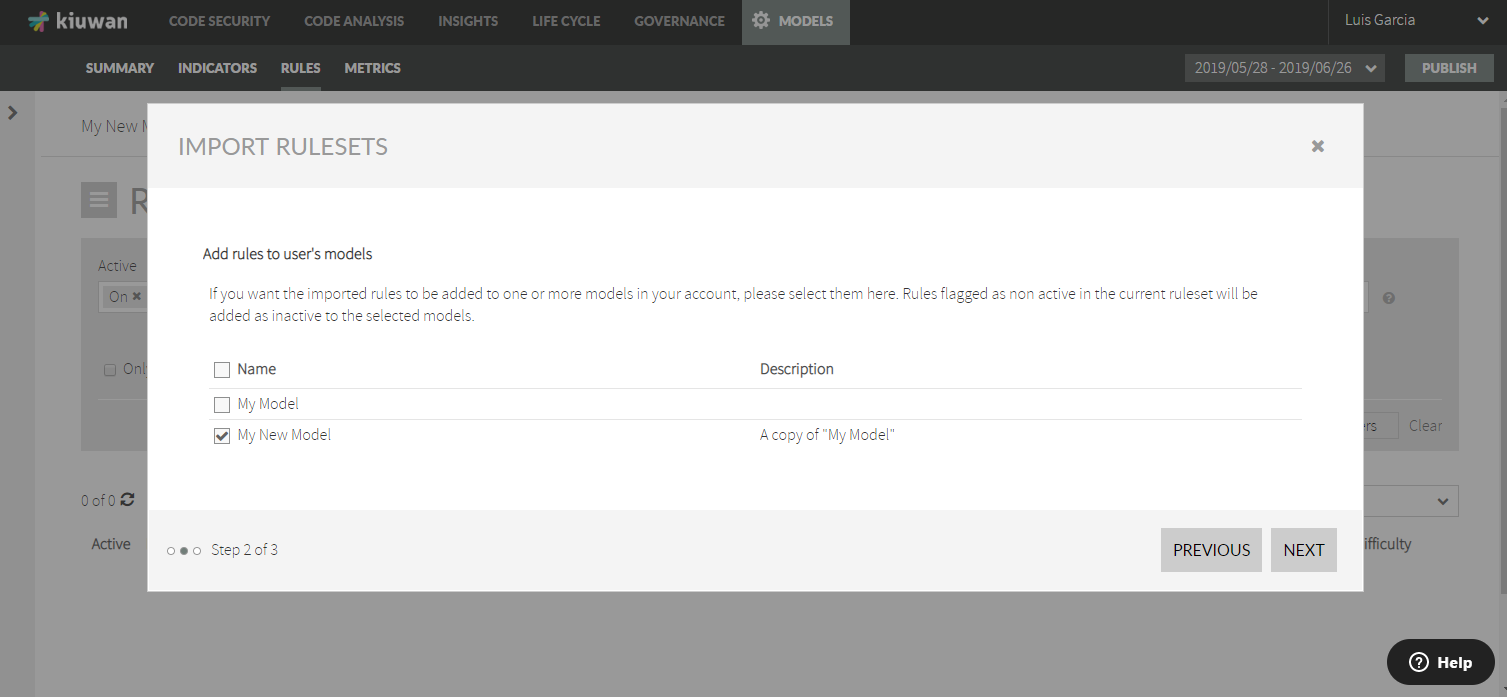
- Click Next. and you will be presented with an import preview.
...

- Click
...
- Import to complete the action.
The model
...
now
...
contains the same configuration as the source model that you exported (activated rules, your priorities, rule parameters, etc.)
...
To import the configuration of another technology, please repeat the above steps.
| Info |
|---|
Once done, do not forget to Publish the model, to make it publicly available. |
...
...